Idea and Purpose
In this project I wanted to accomplish 2 things, first to flex my coding ability, and second to create a tool I could actually use in the future. I accomplished this by using Processing 3 and the ideas of computer vision to create a simple but versatile Augmented Reality Prototype. It took a lot of in-depth algorithms, watching tutorials and looking at example code, and bringing a bunch of different concepts together into this unique little tool.
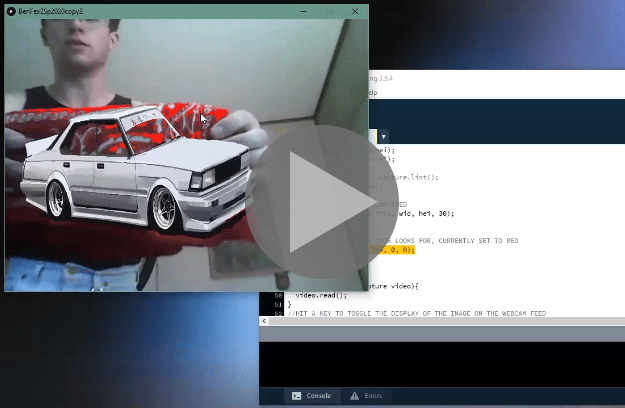
Demo Video
Documentation
Try the Code Yourself: Zipped File and Drive Folder
Coding

I coded this pro type in Processing 3.0, and used a few different techniques an inspirations. I started by looking at computer vision, how to access the webcam feed, and the .video library in processing. A more detailed list of examples and tutorials I looked at can be found in my documentation linked above.
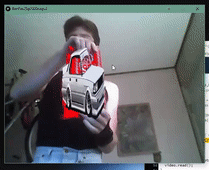
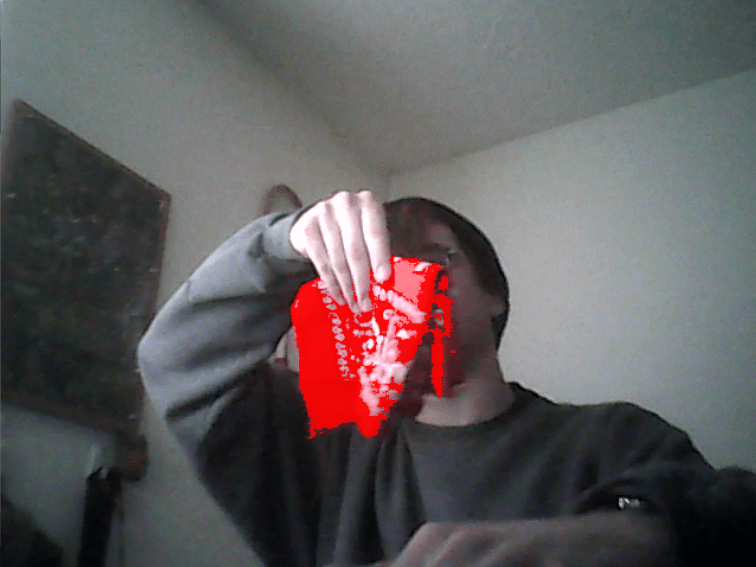
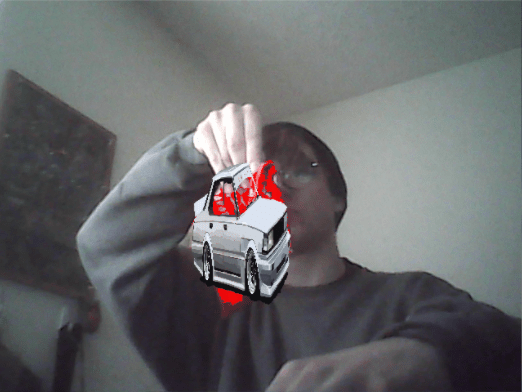
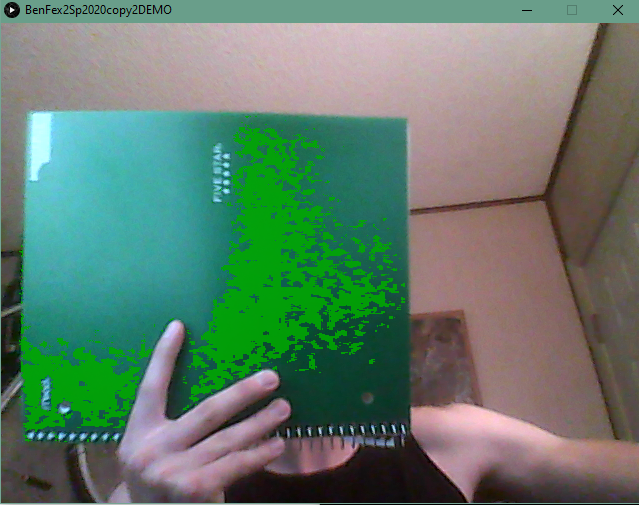
From there I went into the algorithm of actually sorting the pixel from the webcam feed to display the image across. I decided to track by color, for sake of simplicity in coding and using, and made my own simplified version of the pixel sorting and color detecting algorithm to make it easier to run an any computer and with higher res webcams. The more pixels it had to detect, the slower it might run, so I wanted to compensate, but this is at least one place where my terrible quality webcam had an advantage.
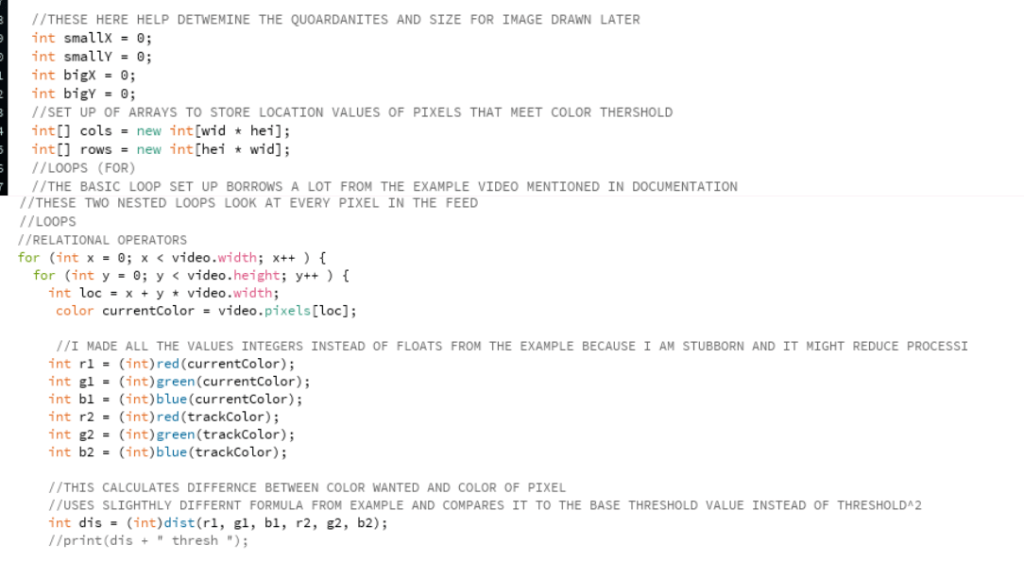
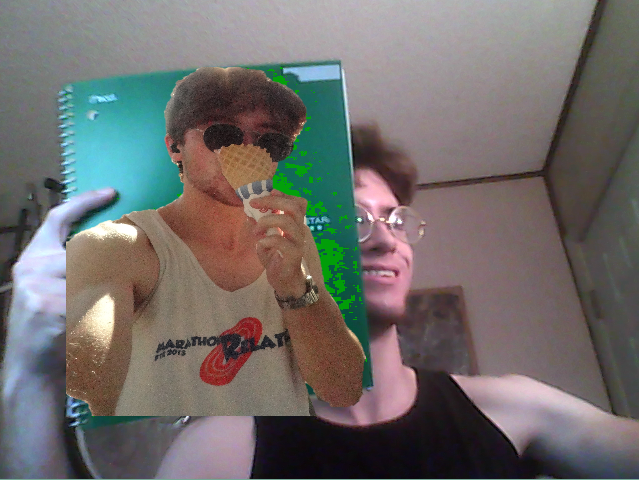
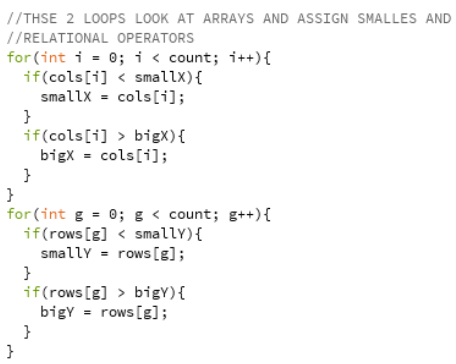
From here I decided upon the colorization of the pixels in the display, but more importantly how to use these pixels to display the image. I messed around with a few different things, from finding the “average” recognized pixel to putting it in the rectangular center of the pixels, but I eventually came to the option which I found to be the best. I found the top left and bottom right coordinate of the recognized area if it was displayed as flat rectangle, and then display the image across the boundaries. Since the two corners of the image are coordinated two the two corners of this imaginary rectangle, the image displayed shifts and contorts with whatever object is being used with the pro type. This was great at giving the image a feeling of depth and realness in a very simple way, perfect for a pro type.

Using The Prototype
I tried to make this prototype easy to use for others and myself in the future, for when I eventually forget all the ins and outs of the code. To start, I made the webcam feed display what pixels are being detected and included in the display calculation by having those pixels being colored over by the color you are looking for. This helps the user not only easily see what color the program is looking for, but also what pixels are being detected so they can adjust the threshold accordingly. I also made the display of the image be toggle-able by hitting the enter button for when you don’t want in your way.
I included plenty of documentation comments in the code itself, and made it so you only have to change three variables to use as you want. These allow the user to adjust to their surroundings and what they want to simulate with the prototype easily.
1. The Threshold: This is the variable to change what pixels the algorithm detect as the desired color. The high the threshold value, the more pixels will be considered, and the lower the value the less pixels. It is generally good to keep in in range of 100-160, and being able to change the value allows for adjusting to lighting and webcam quality.
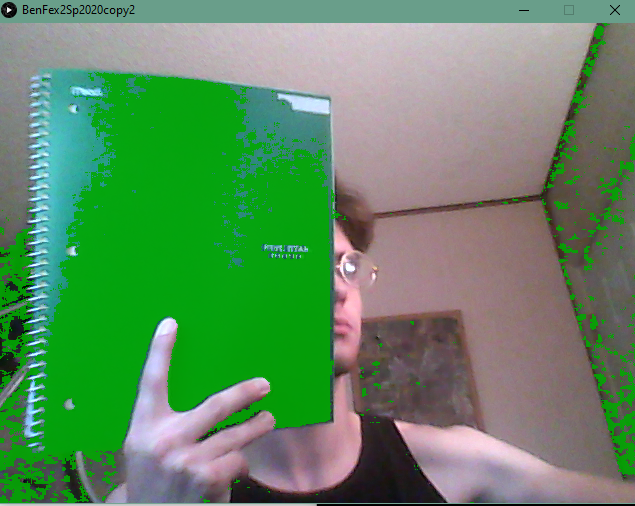
2. The Target Color: Changing this variable changes both what color the algorithm is looking for, and what color the detected pixels are colored over in the webcam, feed. If you are looking for a yellow color, those pixels deems “yellow” enough will be colored over with the exact yellow color the prototype is looking for.
3. The Image: You can easily change the image file to change what image is being displayed. It keeps .png’s transparency but sadly cannot animate .gifs without a lot of work and coding on the user’s end.
Same target color and same scene
Final Thoughts
I’m really proud of this code and prototype. Its both easy to use and really useful, and I’m making sure to keep the program on hand so I can use it in future projects. AR is being used in a lot of new projects because it is such an exciting technology and is not as cumbersome as full Virtual Reality, so this free and very customization prototype should come in handy when prototyping and testing future experiences.
